KB Article #1484
Follow these these steps to verify that vendors are set up properly in ProfitNet. Note: Before you can use CollisionLink with ProfitNet, it must first be set up by YADA. If the interface has not been set up, please contact YADA Support at 800-634-2614.
- Determining whether CollisionLink interface has been set up by YADA
- Verifying a vender is set up in ProfitNet
To determine if the CollisionLink interface has been set up by YADA:
- From the ProfitNet main window, click on the View/Edit Suppliers
 icon.
icon. - From the Supplier window, look for the Import OEConnection Vendors
 and Navigate OEConnection Vendors
  icons. If these icons are not present, the interface has not been set up. Please contact YADA Support at 800-634-2614.
 - If these icons are present, click on the Import OEConnection Vendors icon.
- From the OEConnection Vendor Lookup window, click the Refresh Vendor List icon.
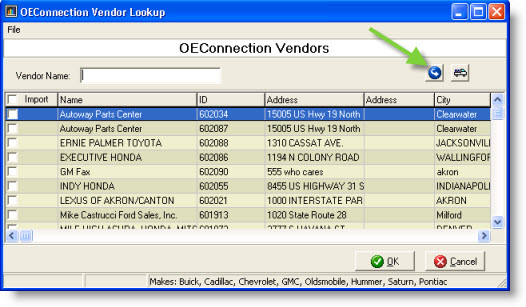
- If the Supplier window refreshes with no error, the interface is set up and you can proceed with the ProfitNet/CollisionLink training. If you receive an error message, the interface has not been set up.
To verify a vendor is set up in ProfitNet:
- On the ProfitNet main window click on the View/Edit Suppliers icon.
- Double-click on the supplier.
-or-
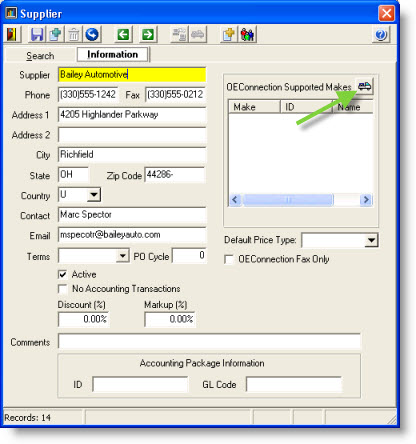
Click once to highlight vendor and then click the Information tab.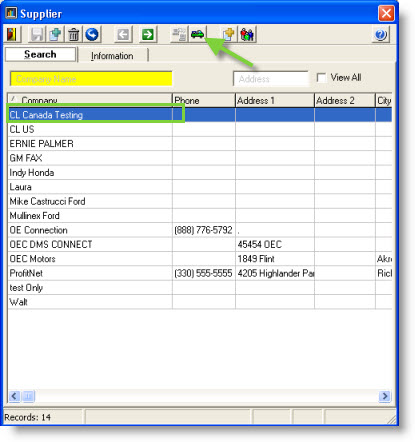
- On the Information tab, click the OEConnection Vendor Lookup button beside OEConnection Supported Makes. This will open the OEConnection Vendor Lookup window.
- Look through this list and find the supplier. If the vendor is not listed, it will need to be added. (Click here for more information on adding ProfitNet suppliers.)

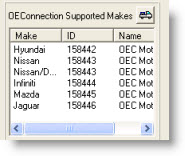
- Check off the box to the left of the supplier’s name. You can check off multiple boxes if the dealer supports multiple OEMs. Once you check off a supplier, their make (or OEM) will be listed at the bottom of the box.
- When finished, click OK. The OEConnection Vendor Lookup window will close and the different makes should now be listed in the OEConnection Supported Makes box.
- Click on the floppy disc
 icon.
icon. - When finished, click the X in the upper right-hand corner of the window to close.